Building a hyper converged proxmox cluster
Published at 2024-4-17
Hyperconverged Proxmox Cluster
I have been messing around with Proxmox (A VM hypervisor) for a few years now and recently moved to running my local dev server on a linux VM in proxmox.
I think I should of stopped here, but I didn’t, I got slightly addicted to watching the STH Tiny Mini Micro videos and the next thing I new I had bought 5 Lenovo 720q thinkcenters off ebay… Not knowing what to do with them, I turned them into a hyperconverged proxmox cluster with ceph
Hardware
Previously I was running Proxmox on a mismash of old hardware but I ran into a few issues. I only had 3 nodes and it would be a bit of a pain for “maintenance”, one of them broke and I ended
up with 2 nodes and a lot of quorum issues. They also didn’t have shared storage and so migrating VM’s was a pain and fairly slow over a 1gbe link.
I wanted to fix of lot of these problems so I decided on atleast 10gbe links and I also wanted to use Ceph.
I still haven’t really worked out what Ceph is, apparently its a “an open-source, distributed storage system.”. What I do know it’s a lot of it’s probably not a great idea to use it on a small cluster in your house.
I think It’s a form of replicated network storage and I learnt what “hyper-converged” means, I think? Having distributed storage and compute on the same nodes.
With this in mind I set out to pick a tiny 1L pc to use, there’s lots of information about using small computers as low cost servers and a confusing number to choice from, I picked the M720q in the end for the following reasons:
- It’s a 1L computer so they don’t really use much physical space
- Great community STH thread
- There designed to be wedged under monitors in office environments and left on for long periods which sounds great.
- was hoping they would idle about 10-15w (spoiler: they don’t.)
- They have a PCIe x8 slot (you do need a seperate riser card, I wanted 10gbe connectivity), can take an M.2 and a sata SSD up to 64gb of RAM
- They are about £80 for a used model on ebay in the UK.
I also decided on using SSD based storage, the M720q don’t have much space in them and I didn’t want to use USB drives. I didn’t need much to actually store much data and consumer SSD’s are fairly cheap, I also had some lying around.
What I didn’t quite consider was that Ceph really doesen’t run very well with consumer SSD’s. Ceph requires the data to be written to the device, most SSD drives first write to a cache and then write this to the disk, this adds latency and given that Ceph needs to wait for the data to be written atleast 3 times (for redudancy) this quickly grinds things to a halt.
There is a solution and thats to use enterprise SSD’s which have “Power loss protection”, the drives have capacitors in them which power the drives for a short time in cases of power loss. That way these drives can respond saying the data is written to disk as soon as its in the cache. They can do this as they have a small ammount of time to write the remaining cache to disk.
There are a few issues with enterprise SSD’s though… Mainly there expensive… There also arent many size 2280 M.2 drives, with U.2 and longer M.2 drives been more common.
I considered using M.2 to SATA adpters, sawing the case to fit longer M.2 drives and in the end just accepted this was going to cost a lot of money and bought the cheapest 2280
M.2 enterprise SSD’s I could find. Which happened to be Kingston DC1000B drives… It’s a bit of a tight fit but they go in.
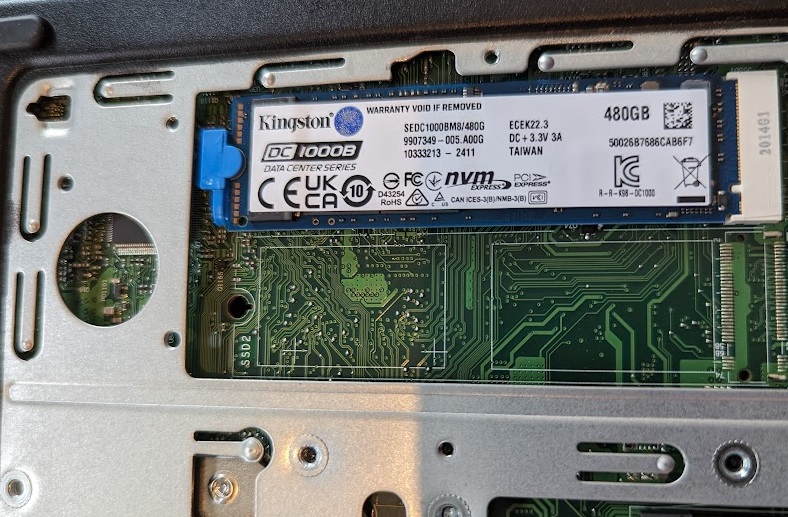 These are built to be boot drives and aren’t really ideal. They also aren’t max out at 480Gb. I also thought about using a SATA SSD, but I realised they woudn’t fit with PCIe card in place.
I did find examples of people getting round this by removing the SSD’s from there case, wrapping them in Kapton tape and smuggling them in. So that’s what I’ve done… Its a bit sketch but seems to work fine.
These are built to be boot drives and aren’t really ideal. They also aren’t max out at 480Gb. I also thought about using a SATA SSD, but I realised they woudn’t fit with PCIe card in place.
I did find examples of people getting round this by removing the SSD’s from there case, wrapping them in Kapton tape and smuggling them in. So that’s what I’ve done… Its a bit sketch but seems to work fine. 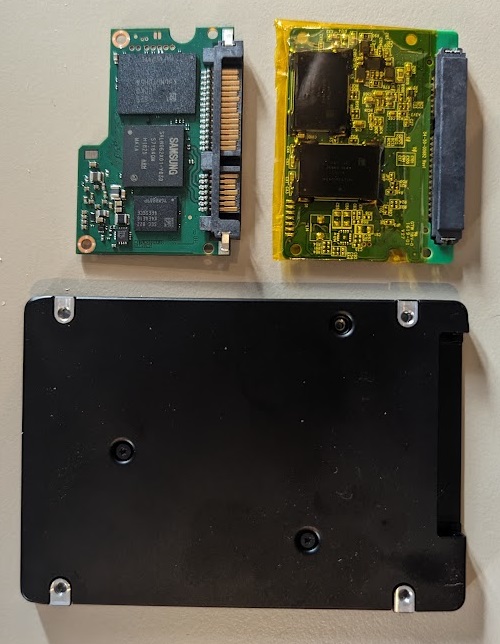
The next issue was the boot drive, it’s “inadvised” to use your boot drive as a drive in ceph, which was a bit problematic. I had seen that people were using USB HDD or some people had swapped out the wifi cards for small NVME’s.
So I found some cheap small NVME drives and some M.2 AE adapters on Aliexpress. They nearly fit, you need to cut a notch into the adapter to get them in next to the power connector. They were recognised and I got Proxmox installed on them.
Unfortuantley I couldn’t get them to boot reliably. If I tweaked the boot order they wouldn’t boot at all. I realised that if the M720q started trying to network boot and failed they would boot though, this took about 3-5 minutes though.
I did find on the STH that someone had used a USB bootloader to kickstart this process and suggested “Clover”. This works great, you set the bios to boot from USB, it boots to the Clover USB which then boots into Proxmox, you can also set the clover timeout to 0 and it boots more or less straight into Proxmox.
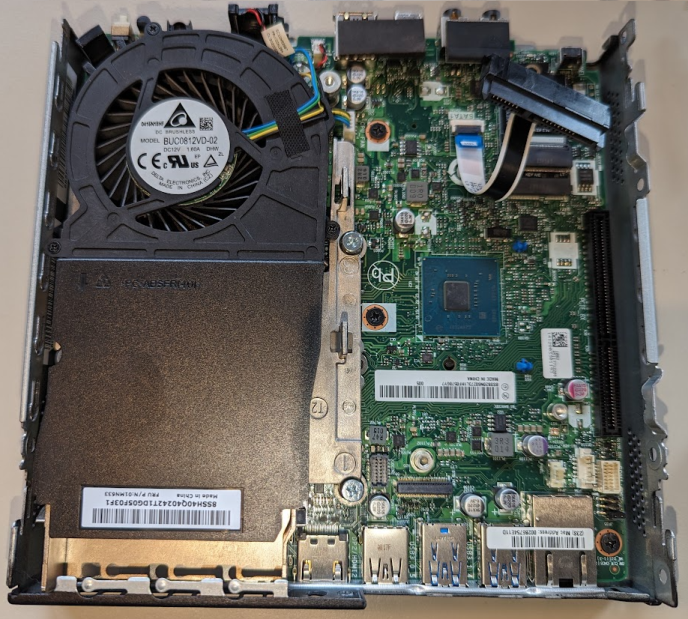
The next thing was 10gbe connectivity, people have put all sorts of cards into these tiny’s, but a lot of people had issues with heat. I saw that the MCX311A was a factory option and I also found these (or a chinease clone?? ) for just over £20 per card, with a few DAC cables thrown in. I picked up Aliexpress’s finest PCIe riser and in they went. They worked as soon as I plugged them in and havent caused any issues, I can touch them while running Iperf3 so i’m not too concerned about thermals.
Parts List
| Part | Number | Price | Total |
|---|---|---|---|
| M720q | 5 | 86 | 430 |
| DC1000B | 5 | 95 | 475 |
| PCI Riser | 5 | 8.45 | 42.26 |
| Boot NVME | 5 | 8.95 | 44.95 |
| KEY A / E to M2 NVME | 5 | 2.37 | 11.89 |
| MCX311A | 5 | 22.83 | 114.19 |
| DAC | 4 | 7.99 | 31.99 |
| USB stick | 5 | 4.2 | 21 |
| CRS309 | 1 | 209 | 209 |
Total Cost: £1,382